When starting to use the SPI (Serial Peripheral Interface Bus) on the Raspberry PI, especially using NodeJS, it can be quite frustrating when you do not get any results (or get seemingly random data) without any obvious explanation or helpful error messages. Then this “SPI loopback” trick might come in handy.
Since SPI seems to be more straightforwards using Python in comparison to NodeJS I will focus the example code on NodeJS. The exact same approach should however be equally valid for Python.
Follow these steps to troubleshoot/debug your SPI connection on your Raspi:
1. First of all, make sure SPI is actually enabled
The SPI master driver is disabled by default on Raspian. To enable it, remove the blacklisting for spi-bcm2708 in /etc/modprobe.d/raspi-blacklist.conf, or use $ raspi-config.
If raspi-blacklist.conf looks something like this:
blacklist spi-bcm2708
Change it to (to prevent SPI from being blacklisted):
#blacklist spi-bcm2708
Reboot or load the driver manually with:
$ sudo modprobe spi-bcm2708
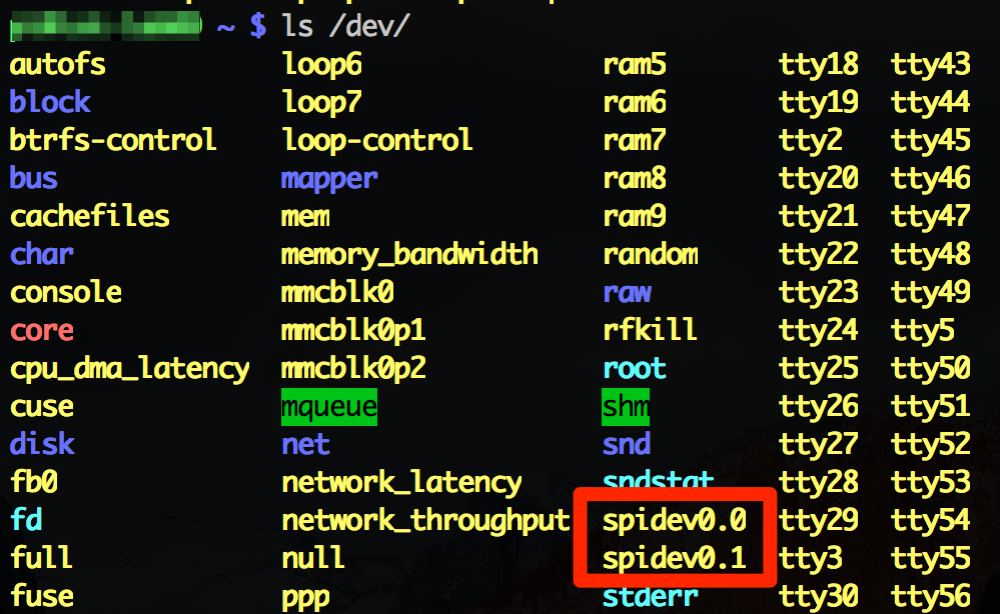
When you have followed these steps, or you simply want to check if SPI is enabled, run the following command:
$ ls /dev
The output should contain something like “spidev0.0” if SPI is indeed enabled.
2. Connect SPI in loopback / “debug mode”
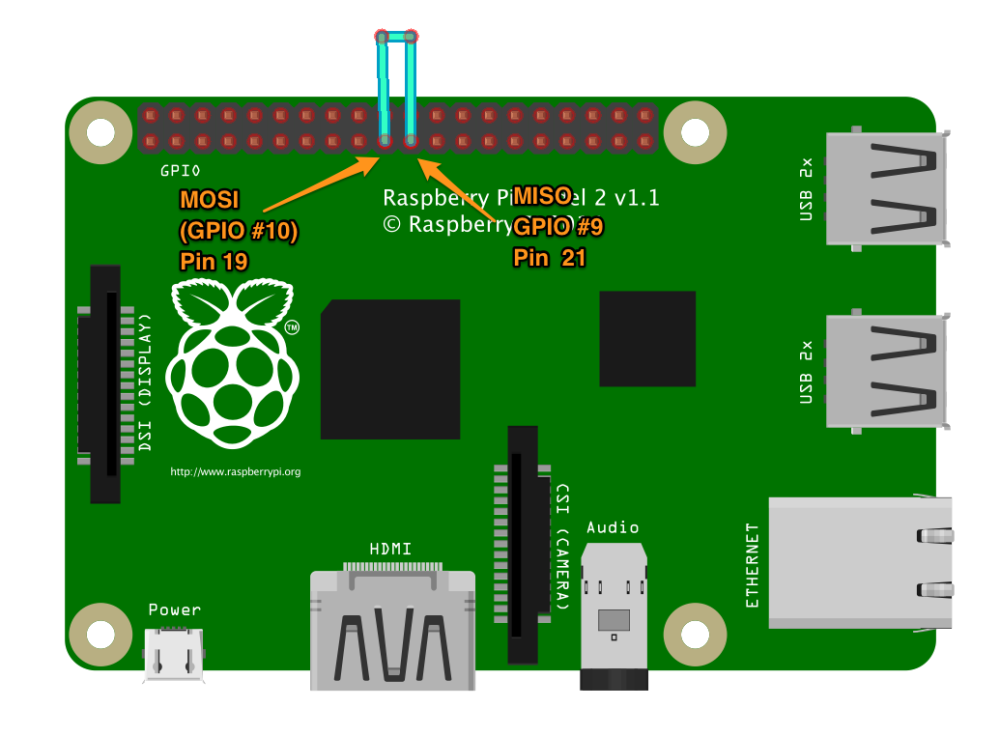
SPI is using two data wires, MOSI and MISO. It might not be apparent what these abbreviations actually stand for. MOSI stands for Master Out Slave In (i.e. it is the input on whatever device you are trying to connect to your RasPi) and MISO stands for Master In Slave Out (i.e. the output of the device connected to your Pi, or we could call this “the Raspi Input”). Ok, so now we understand the meaning, but how will this help us debugging? If the MOSI is intended to receive data from your RasPi and the MISO is intended to send data back to your RasPi, we could simply jumper these two pins to get a “loopback” connection. Whatever data that is sent out from the Pi should get received back.
3. The code – test SPI using NodeJS
This example uses the rpio GPIO library for NodeJS. Copy and paste the following code into a new file (or download the gist).
var rpio = require('rpio');

var rxBuffer = rpio.spiTransfer(new Buffer('HELLOSPI'), 8);

for (var i = 0; i <= 7; i++) {
 process.stdout.write(String.fromCharCode(rxBuffer[i]) + (i == 7 ? '\n' : ' '));
};
Run your script as sudo:
$ sudo node your-script.js
The result should look like this:
$ sudo node your-script.js
H E L L O S P I
$ _
If you receive an error message make sure you execute node as sudo. Should you get an empty response make sure your loopback jumper wire is properly connected.
When you receive the text “H E L L O S P I” you know SPI is properly configured on your Raspberry Pi. The next step is to connect an SPI enabled device in the other end (instead of the loopback) begin writing your actual program. Good luck!


I really appreciate this page, you put a lot of work in to it.
However, the node examples will not work for me. My device works under python but not node.
Maybe it needs updating.
I am using a rpi Zero W if that helps.
Many thanks
LikeLike
Hi, thanks for the feedback! Unfortunately I haven’t been tinkering with the RPis for some time now and I don’t have a Zero W to test with either. Sorry that I cannot be to much help.
Maybe there is some kind soul out there with more experience on the Zero W that have insights they want to share here.
LikeLike